DIY Garage Floor Guide (With Pro Secrets You’re Not Supposed to Know)
A no-nonsense, pro-level guide to coating your garage floor yourself—packed with insider tips, real material specs, and the exact process installers use to get flawless, long-lasting results.
Primo Install Team
7/28/20252 min read

The Only DIY Garage Floor Guide You’ll Ever Need (With Insider Secrets You Probably Shouldn’t Know)
No shortcuts. No hardware store junk. Just the real way to do it—straight from a pro.
Thinking about doing your garage floor yourself? You can get a professional-grade result—but it’s not easy, and it’s definitely not cheap if you do it right.
As a professional installer, here’s the real deal on how to pull it off.
🛠️ Step 1: Prep the Concrete—Grind It, Don’t Just Clean It
Forget pressure washing or acid etching. If you want the coating to bond and last, you have to mechanically grind the surface.
Rent a concrete grinder with a dust shroud and HEPA vacuum
If that’s not practical, some companies (like Primo Garage) offer prep-only services, so you can handle the rest
Grinding opens up the pores of the concrete so your coating can penetrate and bond properly. If you skip this, you’re wasting your time.
🧪 Step 2: Use the Right Materials—No Big Box Junk
Avoid hardware stores completely. The coatings they sell are low solids, watered-down, and not built for hot tires, humidity, or heavy use.
What you need:
100% solids epoxy base coat
Moisture Vapor Barrier (MVB) primer if you’re in Florida or other humid areas
Polyaspartic or urethane topcoat for UV stability and long-term durability
Get your materials from a specialty supplier that serves the coatings industry. You’ll pay more, but you’ll get what the pros use—and that’s the only way to get pro results.
🎨 Step 3: Apply with Precision
Start by cutting in the edges with a brush. Then pour the epoxy in ribbons, squeegee it across the floor, and backroll immediately.
Don’t eyeball it—do the math and use the right amount of product for your square footage
Too much = improper cure
Too little = thin, weak coating
Timing matters—don’t work too slow, and don’t stop once you start.
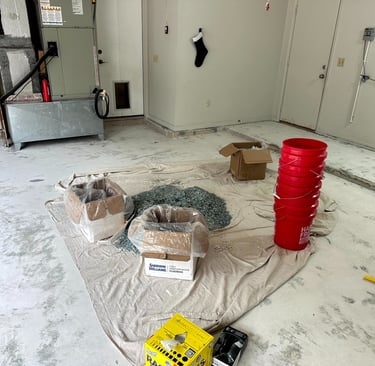
🪙 Step 4: Broadcast the Flakes—Fully, Not Sparingly
If you're doing flake, broadcast to rejection—meaning cover the floor completely until you don’t see any wet spots.
For a standard two-car garage, expect to use about 80 lbs of flake
You’ll recover about half when you scrape, but don’t skimp
Pro tip: walk in cleats while flaking so you don’t ruin the base coat.
🔪 Step 5: Scrape the Floor—Then Scrape Again
Once the base has cured (usually the next day), scrape the surface in all four directions—north, south, east, west to knock down sharp flakes and level the surface.
Then:
Broom sweep
Vacuum thoroughly
This sets the stage for a clean, smooth topcoat.
🧽 Step 6: Nail the Topcoat
Your topcoat seals everything and takes the wear. Most DIYers get this wrong by:
Overworking the product (causes roller marks)
Leaving puddles (they cure cloudy and uneven)
Roll fast and smooth. Don’t backtrack. Don’t leave puddles. And don’t try to stretch the product—coverage should be calculated and consistent.
🎯 Final Thoughts: Worth It? That Depends.
If you follow every step, use the right materials, and time everything perfectly, you can get a floor that rivals a professional install. But here’s the catch:
You won’t save that much money—good products are expensive
There’s a learning curve, especially if you care about aesthetics
It takes feel and skill, and most first-timers don’t get a perfect finish
If you want to give it a shot, go in prepared. Or call in a pro like Primo Garage—we can do the whole job, or just the prep work to give you a solid foundation.
Want to skip the guesswork and get a floor that lasts?
Reach out to Primo Garage for a quote—or ask about our prep-only service to get started on the right foot.
Contacts
info@primogarage.com
Socials
Subscribe to our newsletter
(904) 944-4341